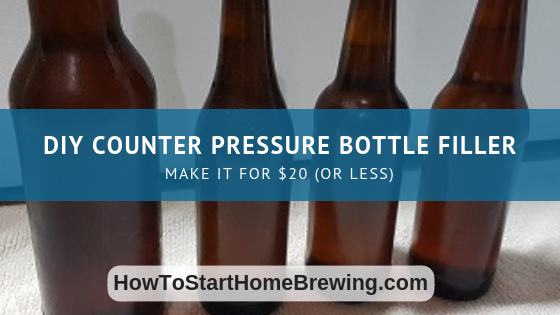
Fact: Most beginner brewers bottle condition their beer.
That shouldn’t come as any surprise, as bottle conditioning is fairly straightforward, easy, and inexpensive.
Sure, there are a handful of brewers out there who jumped straight into kegging, but it’s a rare thing to do.
My Foray Into Kegging
After slogging through a large number of bottles, the itch to start kegging for some begins to grow. It doesn’t come without its own set of hurdles, but it can be more attractive for a few reasons:
- You’re only filling one large vessel as opposed to several bottles.
- You have better carbonation control, with the ability to fix under/over-carbed beer.
- Kegged beer is generally ready to drink much faster, reducing the wait time from grain to glass.
As someone who bottle-conditioned beer for nearly 2 years, these benefits were always on my mind. Still, it took me a while before I finally made the jump to kegging.
Why so long? To be honest, it was the initial expense that made me weary. I wasn’t ready to plunk down a decent chunk of change for a full kegging setup (not to mention a chest freezer to use as a keezer).
However, my growing dread of upcoming bottling days (as well as a couple of gift cards I received for Christmas last year) was the tipping point.
That was that. I eventually found a steal of a deal on a large chest freezer from Craigslist (10 cu/ft for $70) and put in my order for a new keg kit.
After getting everything set up and navigating through a couple of rookie mistakes, I was finally kegging my own beer! It felt great, but there was one problem that I didn’t think through very well:
How was I going to bottle my beer for competitions and to share it with others?
Time for Some Research
Although kegging was going great and my beer was tasting better than ever before, I started to hunt down options to get my beer bottled from the keg.
I knew that I couldn’t just fill it up with a growler filler or some other similar setup. Technically, I could’ve done that, but not without ruining the beer via oxidation. It needed to last several days, not a few hours.
After a lot of research, I narrowed things down to two products that would get me what I was looking for: a counter-pressure bottle filler and a beer gun.
Counter Pressure Bottle Filler or Beer Gun?
A counter-pressure bottle filler seemed like the best option at first. It would help me fill bottles, and minimize oxidation (via CO2 purge) and carbonation loss, and it didn’t seem terribly expensive (anywhere from $50 to $70).
The problem is that it seemed like a pain in the ass to handle, and the cost didn’t include other miscellaneous parts (such as tubing and quick disconnects).
The other viable option was a beer gun. The Blichmann Beer Gun (at least the V2.0 model) seems to get a lot of love in the homebrew community. It’s a one-handed, trigger-operated device. Similar to counter-pressure fillers, the beer gun can purge bottles of oxygen with CO2 and fill them up with relative ease.
The Blichmann Beer Gun also comes equipped with everything you need right out of the box. It seemed like the best choice, and I was so close to picking it up…
…except it was $99.99.
For some homebrewers, that might be worth it. Judging by the reviews and feedback, it seems like a lot of people are really happy with it.
I don’t doubt the product, but I was just having a hard time trying to justify it without trying something else first. Remember, I just spent a good amount of money getting my kegging setup up and running.
The DIY “Beer Gun” Solution
I knew there had to be something out there, so I went back on a quest to find something that worked and was cost-effective.
I quickly found this genius of an idea on the HomebrewTalk forums, and it was (and still is) a very popular thread: https://www.homebrewtalk.com/forum/threads/we-no-need-no-stinking-beer-gun.24678/.
The concept was simple and it didn’t require much more than some things I already had sitting around.
Besides that, a lot of people were reporting a good amount of success with it.
So, I decided to give it a shot.
One thing I want to mention: I took things a step further and created a purging device that I could use in conjunction with this DIY counter pressure bottle filler. The bottle filler itself has no way of purging with CO2.
A purging device isn’t necessary, but I prefer to try to minimize any large amount of oxygen introduced during the bottling process.
That said, I am including the info on what I used to build it and how it works. The good news is that it’s also very inexpensive and utilizes extra parts you might already have around.
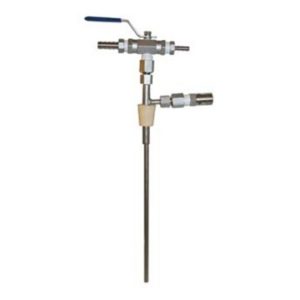
DIY Counter Pressure Bottle Filler Parts
Here is a quick breakdown of the list of parts needed:
The Build
Once you gather all of your parts, the process of building the counter-pressure bottle filler itself is very straightforward.
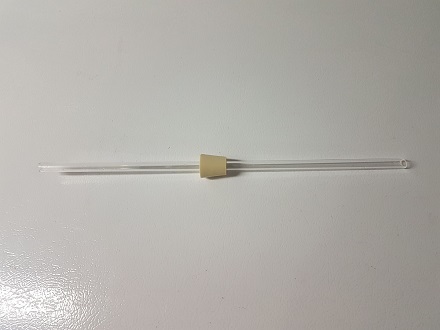
First, you’ll want to take the bottle-filling wand and remove the spring housing from it. You only want the plastic wand itself.
Next, you’ll need a small fine-toothed hand saw. The idea here is to cut off one end of the plastic wand at (roughly) a 45-degree angle. This ensures beer flows easily into the bottle, reducing any bubbles and keeping a strong and steady flow.
After the wand has been modified, use a piece of fine grit sandpaper to help smooth out the end. It’s not necessary, but I found it helpful. It also removes any small pieces of plastic remnants that were left over from the cut.
Easy enough, right? Now it’s time to put together a picnic tap line.
Assembling a picnic tap line is as easy as connecting the liquid disconnect to one side of your beer line and the picnic tap faucet on the other.
Currently, I don’t have any true tap faucets and use picnic tap faucets exclusively. It makes this process just a tad easier since I don’t have to disconnect anything when bottling. If you’re in the same boat, congratulations – you just saved yourself some time and money.
Now that the bottle-filling wand is modified and the picnic tap line is ready, it’s time to connect everything to get it ready for bottling.
First, you’ll take the bottle-filling wand and put it through the hole of the #2 stopper (as shown below). The position of the stopper doesn’t matter, as it can be adjusted up or down depending on what size of bottle you’re using.
The stopper helps provide a seal for the bottle, helping to regulate pressure as the bottle is filled with beer. This ensures minimal carbonation loss, reduced foaming, and minimal oxygen intake.
Now, take the unmodified end of the bottle-filling wand and push it directly into the open end of the picnic tap faucet.
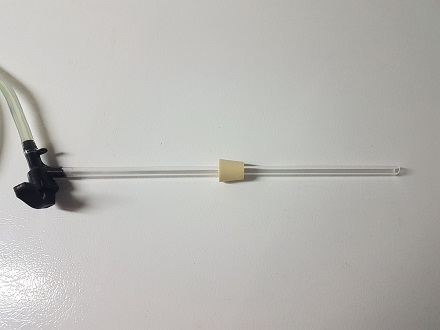
That’s it! That’s all it takes to build your own counter-pressure bottle filler. As I said, it’s super simple and can be done with extra parts you have around your brew space.
With this setup here, you are ready to go off and start bottling your beer, but I’m not quite done yet. I still need to walk you through the build of the CO2 purging device that I created, as well as the process of bottling using both devices.
If you don’t plan to use a CO2 purging device, you can skip the next part and head down to the bottling section. Otherwise, it’s time to dive right into the process.
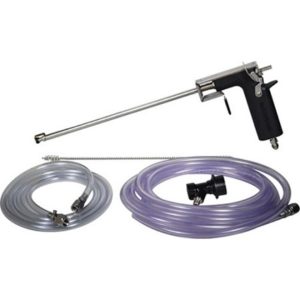
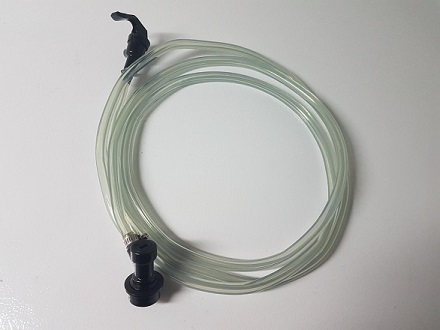
DIY CO2 Purging Device Parts
The breakdown of parts necessary to build this:
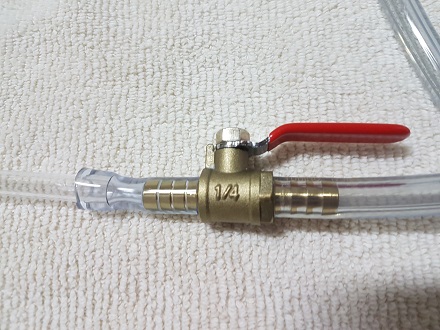
- 5 ft of 1/2″ OD to 1/4″ ID gas line
- 1/4″ to 1/4″ Brass Barb Valve
- Bottle wand
- 1/4″ MFL to 1/4″ Barb Flare Fitting
One important consideration: If you do not have a gas line that has an MFL barbed swivel nut attached to the end of it, the way I have this built will not work. Many brewers who are kegging their beer will have this already, but I wanted to point that out before you read any further.
The Build
Similar to the counter pressure bottle filler, this build is fairly simple.
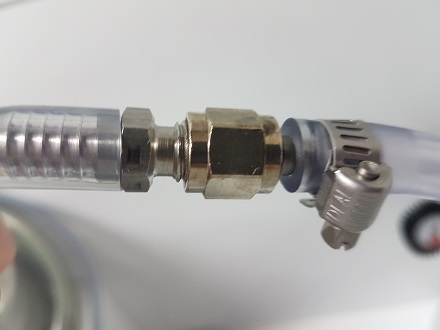
Before starting anything, you’ll want to grab your gas line tubing. Cut off about 6 inches and place it to the side. You will use this later to attach the bottling wand to one end of the barb valve.
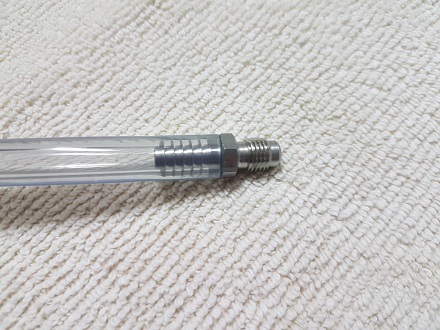
Once you have that out of the way, take the 1/4″ barb flare fitting and attach it to one end of the gas line (threaded side out). This will allow you to connect your CO2 purging device directly to your gas line off of your CO2 tank or manifold.
A quick tip: Make sure that you heat up a cup of water in the microwave until it’s close to boiling. Submerge your tubing into the water for 30 seconds to soften it up. It will make attaching things MUCH easier, to the point they just slip right on.
Next, you’ll take the 1/4″ brass barb valve and connect the other side of the gas tubing. In addition, you’ll need to take that extra piece you cut off earlier and place it on the other side of the valve as shown below.
Remember the bottling wand? Similar to the counter pressure bottle filler you just made, you’ll want to remove the spring housing. This wand, however, will not need any further modification.
Trim the 6 inches of gas tubing down to about an inch and a half. Submerge the end into the hot cup of water for 30 seconds, and slide one end of the bottling wand in until it’s nice and snug.
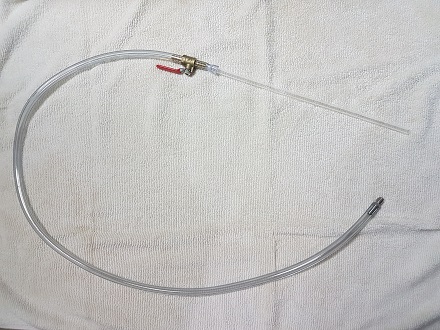
Just like that, you’ve built your own CO2 purging device! How cool is that?
Using Both Devices to Bottle Beer from the Keg
You’ve come this far already, so now it’s time to put the things you built to work.
Like anything else, this will take a bit to get used to at first. Once you establish a routine, however, it’ll be like second nature.
That said, here is a step-by-step breakdown of how my bottling day works:
1) Clean all bottles in a dishwasher using a heat cycle
Gather as many bottles as you need and put them in the dishwasher on a heat cycle. Don’t use any detergent for this. You just want things hot enough to kill off any potential bugs.
If you don’t have a dishwasher, giving your bottles a good scrub, letting them dry, and following the next step should suffice.
You can learn more about cleaning up and reusing old bottles by checking out this post.
2) Sanitize all bottles and cover them with foil
Once bottles are clean, use a sanitizer to sanitize your bottles. I use a bit of Star San diluted with distilled water in a spray bottle. If you’re not doing this, do it now. It’ll save you a ton of time, and having a spray bottle of sanitizer around is convenient.
After letting bottles soak for a bit, swirl the sanitizer around, then dump it out. Grab a piece of foil, give it a quick spray of sanitizer, and cover the top of each bottle with it.
3) Place bottles in the fridge for 30 minutes or longer
The colder the bottles are, the less you have to deal with any foaming issues (though keeping PSI low during filling helps minimize this too). The foil over the top helps keep anything from getting in.
4) Gather the rest of your bottling supplies
You’ll need bottle caps, a bottle capper, and a bucket filled with Star San and water. I use a 5-gallon food-grade bucket. It allows me to keep my CO2 purging device and counter pressure bottle filler sanitized while I use each one interchangeably.
It’s also great for dipping filled bottles in to rinse off any beer that might overflow from the fill.
5) Turn down PSI on the regulator and purge the keg
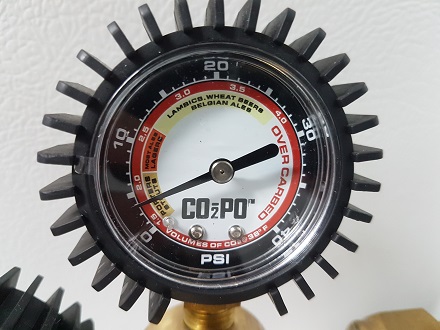
Keep your regulator PSI around 4 psi to make filling bottles easy. You want a slow and steady flow. My lines are 10 feet in length, so you may need to adjust them based on your line. Generally, the longer your line, the higher your PSI can go. I find 4 psi to be the sweet spot for me.
Once your regulator is good, purge your keg until things have leveled out.
6) Attach CO2 purging device
Right now, I use a 4-way gas manifold with an MFL barb swivel nut on the end of each gas line. It allows me to unscrew my gas disconnects and utilize the CO2 purge build whenever I need to use it.
To attach it, I make sure the CO2 to the line is off and unscrew my gas disconnect. I screw in the end of my CO2 purger. Making sure the valve on my CO2 purger is off, I turn on the gas line and it’s ready to go.
7) Attach DIY counter pressure bottle filler to a picnic tap faucet
I covered this step earlier in the explanation of the bottle filler build. Grab the #2 stopper, push the bottling wand through it, then slide the rounded end into the picnic tap faucet.
8) Empty the beer line
I always run out a few ounces of beer in the line first since it can be a bit stale. Doing so helps ensure the freshest beer is getting into the bottle.
9) Purge the bottle with CO2
Again, this is pretty easy. Take the sanitized end of the CO2 purger and place it into the bottle. Open up the value and once you hear CO2 start to flow, let it go for a few seconds. As you move the wand up, shut off the valve. Your bottle will be purged and ready to fill.
10) Fill the bottle with beer
Immediately after you purge the bottle, it’s time to fill it up.
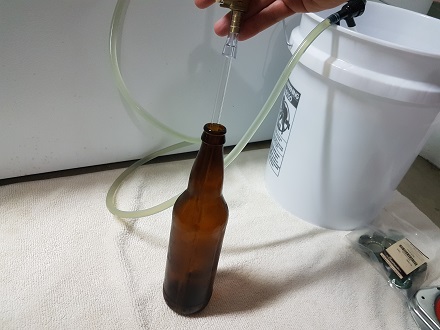
Place the bottling wand directly into the bottle. Push down on the stopper until it has a decently snug fit on the bottle. It should provide a good seal on most bottles.
Next, open up the picnic tap faucet completely. As the bottle starts to fill, you’ll notice it begins to slow down. This is due to pressure building inside the bottle. The image below was before the fill, but it gives you an idea of the process.
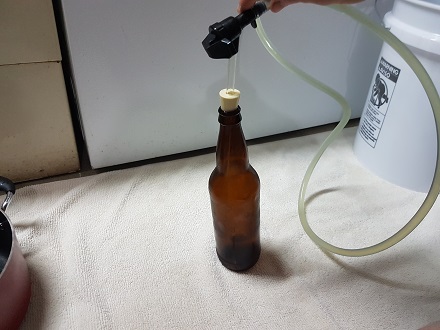
Each time the flow starts to slow down, gently push on the stopper with your thumb to release some pressure, then push it back down into place. The flow will pick back up until pressure builds once again. Rinse and repeat until the bottle is filled.
Once filled, close the picnic tap faucet and remove the bottling wand. Using the CO2 purging device, give the top of the bottle a quick blast of CO2 before capping.
11) Repeat steps 9 and 10 until finished
That’s all there really is to it! As I mentioned, it will take a bit of getting used to at first, but it’s honestly a simple, cost-effective way to fill bottles from the keg.
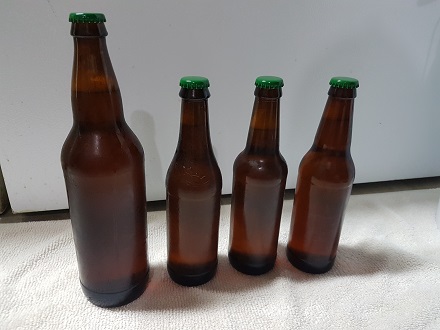
Even better – you’ll end up with sediment-free bottles of beer that are perfectly carbonated and ready to be stored away.
Some Tips and Final Thoughts
If you want to get the most out of your DIY counter-pressure bottle filler, here are a few tips that will help:
- If you experience significant foaming, check the PSI on your regulator. Turn it down a bit, purge the keg to equalize pressure, and give it another shot.
- Try a few practice runs before committing to several bottles. Doing this will help you figure out the process and find what works best for you.
- If you get your PSI low enough to where you have a decent flow (albeit very slow), I’ve found that bottles don’t need to be super cold. In fact, you can get by with them at standard room temp.
- I’ve had no issues with carbonation when storing beer long-term. Typically, my bottles are stored in the fridge, but I’ve stored them warm and drank them several months later with no issues. I’ve sent off numerous beers to competitions and have also had no comments on low carbonation.
Overall, I hope that you have found all of the information in this post useful. The DIY counter pressure bottle filler and CO2 purging device have been great tools in my home brewery. Bottling this way is definitely a process I don’t see changing anytime soon since it has worked so well for me.
If you have any questions about building this setup for yourself, please feel free to drop a comment below!
Your “contact us” doesn’t work. If I ferment in corny kegs what happens to the trub? I would like to build your counter pressure bottle filler. I don’t want to pull trub out of keg and into bottles. Any information you can provide is greatly appreciated!
Hey Steven – I apologize for the issues contacting us. Need to get a form back up on the page to make that a bit easier!
I’m assuming you’re pouring from the same keg that you’re fermenting in? If so, most of the trub should’ve settled out by the time your beer is crashed and carbed. In that case, you should be able to use the bottle filler as normal. I would just be mindful about moving the keg around itself so you don’t kick up any sediment.
Also, I know some guys who ferment and pour from the same kegs typically cut their dip tube a bit shorter so that they don’t pull trub. I haven’t done that before, but it’s definitely an option.
Hope that helps!