
Ask any skilled home brewer if they became a flawless beer-making machine overnight, and you’ll probably hear them mutter things like “I made too many mistakes” or “I didn’t know what the hell I was doing”.
For new home brewers, knowing seasoned vets were practically clueless about the brewing process when they got their start should be a confidence builder. Still, it doesn’t mask the fear of making mistakes along the way.
If there is anything guaranteed in home brewing, things can and will go wrong. However, the difference between making good beer and great beer is not only recognizing and learning from these mistakes but also knowing how to prevent them!
Wouldn’t you feel better if you knew what you were up against?
The 21 Most Common Beer Brewing Mistakes
Below is a list of the most common mistakes home brewers frequently make (in no particular order). Some of these methods and techniques will take some time to develop properly, so don’t beat yourself up if you keep tripping up over something.
1 – Not sanitizing anything that may contact your beer (from brew to bottles)
Failing to follow proper sanitization techniques is, without a doubt, one of the most common beer-brewing mistakes that new brewers make. Other than your kettle (which will boil off any bacteria – just make sure it’s clean and free of debris), everything that touches your beer in any way needs to be properly sanitized.
Be warned: the above is not to be taken lightly. When we say sanitize everything, we mean it. Screw this up, and you can guarantee you will be dealing with an infection or serious off-flavors that will ruin all of your hard work on brewing day.
2 – Not chilling your wort properly
In order to pitch your yeast and get the fermentation process moving, you need to chill your wort post-boil. Ideally, you want to bring the temperature down into the 65 to 75-degree range.
Like anything else, a lot can go wrong here. If you pitch your yeast into wort with a temp higher than 75 degrees, you risk off-flavors (such as fusels, which is a solvent-like taste) developing in your newly brewed beer.
Another thing to pay attention to is the handling of your wort as it cools. For any temp readings, it is important that you sanitize your thermometer beforehand. Forget this step, and you risk introducing bacteria into your wort.
3 – Not having the right tools or equipment
Making beer requires a lot of different equipment, with each piece working together as you move through the steps from start to finish. While there might be plenty of “brew hacks” out there, nothing works quite like the right tool for the job.
Here are just a few examples of when not having the right tools or equipment can go wrong:
– Underestimating your batch size and using a kettle that is too small will leave you scrambling and trying to adjust your recipe on the fly.
– The lack of a bottling wand can have you dealing with a huge mess during bottling (and less beer as a result).
– Not having the proper sanitizer could leave harmful bacteria on equipment, inviting infection to find its way into your batch.
– No bottling bucket to transfer to, which can introduce trub and other remnants from your primary fermentation vessel into your bottled beer.
Remember: Preparation is half the battle. Make sure you always have the right equipment and your brewing day will be much easier to handle.
4 – Not watching your kettle during the boil
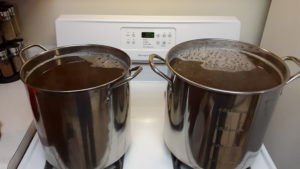
You can probably guess how bad this can get, but just to give you a visual, imagine this: A boiling hot mess of sweet and sticky wort spewing out of your kettle, completely caking your stove and kitchen floor. Your brew day just turned from a full day of fun into a full-blown nightmare. Yikes!
Here’s the thing: the process of boiling wort is a long one. A vigorous boil will cause the level of wort to quickly rise in your kettle (especially during a hot break). Throw in any additives (such as hops), and your boil is about to go all sorts of crazy. It needs to be contained.
The best way to do it? Keep an eye on your kettle during the boil at all times. If you run into any issues where the wort is rising quickly, reduce the heat and stir. Follow this pattern until your boil is finished.
The most common saying in home brewing has never rung more true: “A watched pot never boils over, but an unwatched pot always will”.
5 – Not giving yourself enough time
If you didn’t already know, making a decent batch of beer takes a lot of patience. It’s a process from beginning to end. Not only do you need to give yourself enough time on brewing day, but also throughout the fermentation and bottling conditioning phases.
We get it – you’re excited to taste the first batch of your homebrew, but cutting corners is only going to make things worse. Measurements are off, hops aren’t added at the right times, water isn’t cooled down enough to pitch yeast, and so on. While it might not seem like a big deal at the time, all of these small missteps will have a HUGE impact on your final product.
6 – Using brushes to clean plastic vessels
A majority of beer brewing kits come equipped with plastic fermentation vessels (which we highly recommend for beginners). While it might sound crazy, a lot of new home brewers aren’t familiar with how to properly clean them.
You might be thinking, “Properly clean them? How hard can that be?” The good news is that it isn’t hard, but the bad news is you’re probably not doing it right.
If you’re using any kind of brush or other abrasive material to clean your plastic vessel, you’re essentially ruining every future batch of beer that you create.
Brushes and other materials with rough surfaces cause scratches in plastic. These small, microscopic grooves can leave room for bacteria to grow. Your entire goal during fermentation and conditioning is to minimize bacteria, not harbor it.
Skip out on the brushes or rough sponges and go with a soft washcloth instead. You’ll be thankful you did. That, and you’ll save money because your equipment will last longer.
7 – Over-carbonating your beer
Another one of the most common beer brewing mistakes is over-carbonation. It’s another reason why taking your time and measuring everything out properly is all the difference. Add in too much sugar and before you know it, you’ll be hearing the sweet sounds of a beer explosion. Oh, and you’ll have one hell of a mess on your hands too!
If you’re unsure of how much sugar you will need to carbonate your beer, use a beer priming calculator to help you determine the exact amount you will need. It’s quick, easy, and will save you the trouble of having to guess and risk throwing all of your hard work down the drain.
8 – Not letting your beer ferment long enough
Remember how we just talked about patience? Well, you’re going to need to exercise that during the fermentation process.
As a general rule, you should allow at least one week for your beer to actively ferment in primary. While you could rack to a secondary vessel after one to two weeks, keeping your fermented wort contained in the same vessel as your primary will cut down on the chances of oxidizing your beer during transfer.
In other words, a second vessel for secondary fermentation is NOT necessary.
How will you know that your beer is done fermenting completely? The answer is found through daily gravity readings.
Using a hydrometer, if your readings are consistent and your gravity does not continue to drop, you’re ready to bottle.
If you’re impatient, you risk dealing with “bottle bombs” should you bottle too early. Not a good time, unless you’re into cleaning up booze and glass shards.
9 – Using low-quality tap water
To a new brewer, water might seem like, well…water. Just turn on your faucet, get what you need, and be done with it, right? If it were only that simple.
Although more of an advanced topic, the quality and overall water profile in your local tap water can be the difference maker for your beer. Poor quality water can lead to all sorts of off-flavors, even if you get everything else right.
Our suggestion: Use bottled or distilled water over tap water until you learn how to properly filter local tap water and know more about water profiling.
To learn more about understanding water profiling, check out the book Water by homebrew legend John Palmer.
10 – Storing beer in unstable temperatures
Temperature control during fermentation is another key element in determining the outcome of your final product. Unfortunately, a lot of people seem to neglect the importance of it, leaving them wondering how their beer ended up tasting “off” when everything else in the beer brewing process was performed without error.
If you let your beer ferment in primary at a temperature that is too cold, your yeast will be dormant. If the temperature is too high, you risk the introduction of fusel alcohols (solvent-like flavors) due to the extreme yeast activity. These off-flavors can kill your overall taste and are often difficult to recover after primary fermentation is complete.
How can you ensure your beer won’t suffer from unstable temperatures? First, get a thermometer adhesive strip for your fermentation vessel. This will help you keep an eye on the temperature at all times.
Now, you will want to make sure you store your beer in a cool, dark space (e.g. a cool basement, storage room, or closest will work). The ideal temperature for fermentation is between 60 and 70 degrees fahrenheit.
If you live in a warmer climate, consider purchasing a fermentation cooling jacket. These insulated jackets are fantastic at helping maintain stable fermentation temperatures.
Should the fermentation jacket not work to keep things cool, wrapping your vessel in a cold wet towel will also work. Just make sure to replace it every 8 hours with a new wet towel. Is it cumbersome? Yes, but it’s a workable solution for anyone not looking to invest in a fermentation insulator.
11 – Not writing down notes in a brewing journal
Much like a chef writes down all of the details of their recipes, home brewers keep detailed notes of their brewing process from beginning to end. This includes recipe formulation, brewing day processes, gravity readings, and so on.
If you want to consistently improve your process and beer recipes, taking notes on everything you do is critical. By forgoing this important step, you will only make it harder for yourself to identify any flaws or inconsistencies you may face.
See this post to learn more about brew journals and their importance in the overall brewing process.
One thing to note: While a simple spiral notebook will do just fine, you may want to consider something with a hardcover. Brew days tend to get a little messy, and you wouldn’t want your notes to get damaged in the mix of things.
12 – Trying to tackle a complex recipe or method as a beginner
We’ll admit that once you start brewing, you’ll be hooked! If you’re like anyone, you’ll already be dreaming of some wild ideas on what you’ll brew up next. Or maybe you already have?
Here’s the problem: Starting off with a complex recipe or process isn’t the best route to follow. It’s like thinking you can rebuild an engine because you changed your air filter once or twice before.
Will there be a few that do this and come out with something amazing on their first go? Sure, but it isn’t too common.
Don’t risk the chance of giving up too soon by making things more complex. Focus on learning and understanding the process. Start with a simple recipe to get going and refine it from there.
Once you become more skilled, then it’s time to shoot for the moon!
13 – Relying on airlock for signs of active fermentation
Nothing says fermentation quite like an airlock that’s rocking away, right? Turns out that isn’t always the case.
When your beer begins to ferment, it will create carbon dioxide as the yeast is converting sugars into alcohol. This builds pressure inside of your vessel, which pushes the carbon dioxide through the airlock.
That causes the bubbling that we all know and come to expect. The problem, however, is that this doesn’t always happen.
While there are several factors at play, the golden rule is that you should never rely on airlock activity to be your sole indicator of fermentation.
If you’re doubtful that fermentation isn’t taking place, do the following before taking more drastic measures (such as pitching more yeast):
– Check for a layer of krausen on the top of your wort. This foamy-looking layer will appear thick and is completely normal.
– Pull a sample to check the gravity. If your current gravity is lower than your original, your beer is trucking right along.
14 – Not putting together a brew day checklist
If you have a few brew days already under your belt, you probably know the importance of a brew day checklist. Regardless of what level you’re on, it doesn’t hurt to be reminded.
A checklist will help guide you through your process from beginning to end, ensuring you don’t miss any important steps along the way.
Another smart thing to do: Couple your checklist with a brewing journal for precise record keeping and much tighter control of the variables in your process.
Don’t be that guy or gal who just “wings it” and hopes for the best.
15 – Oxidizing your beer during transfer and/or bottling
Inexperienced home brewers have a tendency to forget to handle their beer with care. It gets shaken, stirred, and rocked around during transfer and bottling.
In hindsight, this might not seem like a big deal. However, introducing too much oxygen into your beer after fermentation isn’t a good thing.
Ever had a beer that tasted like a musty attic? That is oxidation, my friend. Not a pleasant taste or aroma.
Do yourself a favor and rack your beer with care by controlling the flow. Don’t let your racking cane sit in a vessel in a way that will agitate your beer.
A few bubbles here and there are fine. Just remember that the more careful you are in handling your beer, the fewer chances your beer comes out tasting like grandma’s house.
16 – Drinking too much during your brew day
Brewing beer and enjoying homebrew go hand-in-hand. It’s when brewing beer comes full circle.
However, there is a difference between enjoying a beer or two and treating your brew day like a night out at the bar.
Point blank: Getting hammered and brewing brings nothing but trouble.
Think about it – the more you drink, the more you will forget about or miss along the way. Things aren’t measured correctly, temps are too high/low, and watching the kettle during boil goes on the back burner (no pun intended).
Drink as you wish, but not like a fish. Enjoy your brew responsibly and you’ll have much less room for error.
17 – Dumping in trub from wort into your primary fermentation vessel
When you boil and chill your wort, any proteins and additives (hops, spice, citrus zest, and so on) eventually make their way down to the bottom of your kettle.
While this is what you want to happen, the key is to keep it there.
When dumping your chilled wort into your primary vessel to prep for your yeast pitch, you need to do so slowly so that once you begin to see your trub at the bottom, you can pull back to prevent all the remains from funneling into your wort.
If you do as some of us have done before and accidentally dump it all in, you won’t necessarily ruin things entirely. Instead, you’ll be dealing with more unwanted particles in your beer and will have to exercise better control in preventing it from reaching your final product in the bottling process.
A quick tip: Pour your wort through a mesh strainer (sanitized, of course) when transferring it into your primary vessel. You’ll cut down on any trub and also help filter out more unnecessary elements.
The result is a beer with significantly better clarity.
18 – Not knowing the difference between cleaning and sanitizing
Cleaning and sanitizing are two things that get thrown around frequently, yet they are very different from each other. One is not a substitute for the other. They are both very necessary in order to produce good, clean, and infection-free beer.
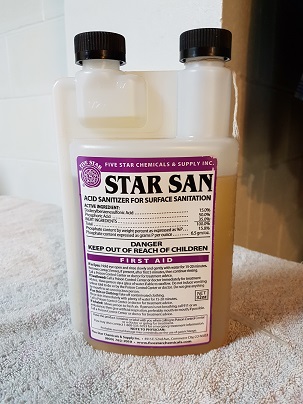
Keeping your equipment clean will help prevent buildup and grime, all of which have the potential to infect your beer. Still, harmful microbes can be found on the surfaces of your brewing equipment, which is why an acid-based sanitizer like StarSan is used to eliminate them.
Just think of cleaning as a way to eliminate grime and grit that we can see and sanitizing as removing the microbes that we can’t.
If you want your brewing equipment to stand the test of time, always make sure you clean it before and after brewing with either PBW (which is a safe food-grade cleaner) or soap and water (using a washrag and not something abrasive, unless you’re cleaning glass).
19 – Not checking dates on ingredients
The concept here is simple. If you want the best beer, always make sure you’re working with the freshest ingredients.
I have had people give me malt extract they didn’t need or want, only to find out it was old as dirt. No wonder they gave it away. What a waste!
That said if you plan to reuse any of your hops, grain, spices, or additives, make sure you store your ingredients properly to ensure they remain as stable as possible.
Some storage tips for your unused ingredients:
– Keep unused grain in a sealed bucket or sealed airlocked bags and store in a dark, cool location
– Store hops in a sealed airlocked bag in your freezer
– If using extract, store extra unopened containers in a cool area that is free of light
20 – Not giving yourself enough room in your workspace to work with
Depending on your setup, brewing equipment can take up a lot of room. If you’re dealing with limited space, things will quickly pile up.
Having a clean and spacious work area is preferable, but it isn’t ideal for everyone. For those brewing in small spaces (small apartment kitchens, for example), you want to make sure you adjust your brewing area to allow for as much room as possible – even if it means moving a few things around temporarily to make it work.
It might sound silly, but the tighter your work area is, the easier it is to make mistakes. It’s the last thing you want when you’re handling extremely hot and sticky wort.
21 – Not sharing your finished product with others who can help you improve
One of the best things about home brewing is that you get the opportunity to share your creations with others. Not only is it satisfying to see others enjoy your hard work, but it’s also an excellent chance to get valuable feedback on ways to improve and refine your recipes.
If you’re drinking all the beer you make, how will you know just how good it really is?
Here’s how to get past that: Link up with other home brewers who can actually give you solid feedback!
Depending on where you live, you may be able to join a local home brewers club. Check for local meetups to learn more about brewing and how other home brewers approach it. You’ll also get to participate in beer swaps, which give you the chance to try other beers and give YOUR feedback.
You know what they say: Help others and others will help you.
In Home Brewing, The Learning Process Never Ends
As they say, knowledge is power. The more you know, the better prepared you will be to tackle problems before, during, and after your brew day. Hopefully, this will have equipped you with more ideas on what to avoid as well as what to try.
Brewing great beer takes time, patience, and a lot of hard work. Remember to have fun, soak up everything you learn, and don’t be so hard on yourself! It’s the only way you will continue to improve as a home brewer.