Whether you’re brewing a high-gravity beer, whipping up a large batch, or want to ensure your yeast count is nice and healthy, you’re probably familiar with yeast starters.
Making a yeast starter isn’t difficult. In fact, it’s actually quite simple. A little water, and some dry malt extract, boil, cool, then pitch your yeast and you’re on your way.
As I said, the process itself isn’t tough. It does, however, take time. For me, that means roughly 30 minutes total from gathering equipment to pitching yeast and putting things away.
Are 30 minutes of time to devote to this process really THAT bad? Depends on who you ask.
These days, between working full-time and being an active husband/father with 3 young children, our household is always on the move. I can’t tell you how many times we’ve been gone all day and ended up coming home late in the evening, only to realize that I still have a yeast starter to prepare.
No matter where you’re at in life, things get busy. An extra 30 minutes might not always be easy to come by.
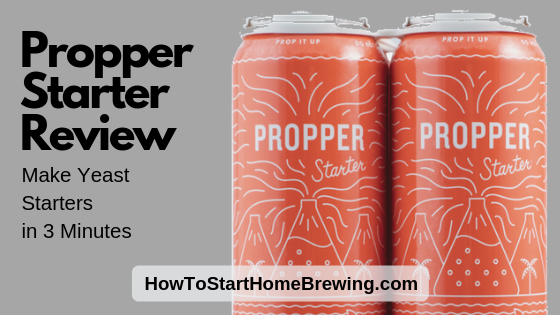
Here’s the thing: you don’t need 30 minutes anymore. Thanks to a little magic wort in a can cleverly coined Propper Starter, you can get that extra time back without sacrificing your little yeasty friends!
What is Propper Starter?
Less time, less fuss, yet still powerful enough to drive yeast into a healthy growth phase. That’s the idea behind this fresh wort in a can.
Canned wort is nothing new to the scene. Northern Brewer first came out with a canned wort product called “Fast Pitch” a few years ago (which still exists today) to help brewers save time on making yeast starters.
Propper Starter is the same concept – sterilized wort in a can, ready for yeast to drop in and start chewing things up! Omega Yeast is the company behind it all. If you aren’t familiar with them, they produce a wide variety of fantastic liquid yeast cultures for commercial and homebrewers alike.
Being a big fan of Omega Yeast (and unfortunately running into some issues with a few bad cans of Fast Pitch the first time I tried it), I knew I had to get my hands on this stuff as soon as it came out.
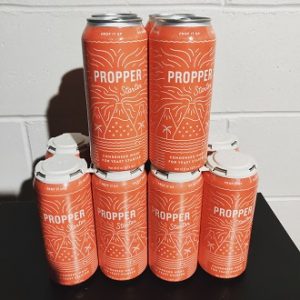
I quickly acquired a 4-pack and before I knew it, I was off and running. After having achieved some great and consistent results a few times over with this stuff, I decided to write this post and document the process. You’ll get to see just how simple it is to utilize what I call “convenience in a can”.
How to Use Propper Starter
Making a yeast starter with Propper Starter is a breeze. In just minutes, you’ll have a 1.040 OG wort ready to welcome your yeast. No fuss, no mess. Just a couple of quick steps are all it takes.
To get started, you should have to have the following:
- 1 liter (or larger) flask
- 1 can of Propper Starter
- 16 oz of distilled (or bottled) water
- Funnel (not necessary, but I find this easier to fill a flask and pitch yeast without creating a mess)
- Yeast
- Scissors
- Sanitizer
Of course, you don’t need to use these exact items. For example, a smaller growler jug instead of a flask will also work just fine. The list above is purely what I have ready to go each time I’m ready to get another starter ready to go.
Once you have your items ready to go, you’re ready to follow the steps below to create your yeast starter:
Step #1 – Sanitize everything
If you’ve got a spray bottle hanging around with some distilled water and Star San, this step is a breeze. Just spray down everything – your flask, Propper Starter can, funnel, yeast packet, and scissors.
Those that don’t have a spray bottle handy, just mix a Star San solution and dunk everything I listed above into it. That’ll ensure everything is properly sanitized and prepare you for the next steps.
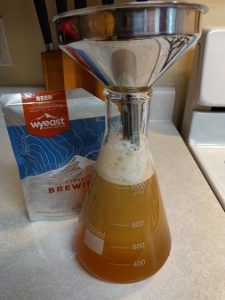
Step #2 – Pour Propper Starter into a flask
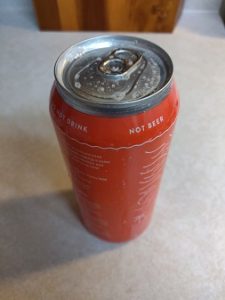
Carefully pull the tab on the can and open it up. For some insurance, I usually give the top another quick spray of sanitizer after opening, though this isn’t necessary.
Once opened, pour the entire can of wort into your flask. Make sure to pour it carefully. Going too fast or too slow can cause wort to drop down the sides of the can, creating a bit of a sticky (but easily wiped up) mess.
To catch any potential drips, I hold my flask over a sink as I pour. Again, you don’t have to, but I’m all about keeping things clean! This is where having a funnel can come in handy, as it makes things a bit easier to handle.
Step #3 – Top off with 16 oz of distilled (or bottled) water
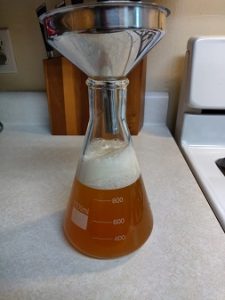
Now that your Propper Starter wort is in your flask, all that’s left to get things up to volume is to top it off with distilled (or bottled) water.
Note: I highly recommend NOT using tap water. Some people have done this and haven’t had any issues, and while that’s great, I’d rather be safe than sorry.
In the long run, it’s only 16 ounces of water. You can pick up a gallon jug of distilled/spring water for roughly $0.80 around here, which will help you make 8 starters. If you’re already investing in canned wort, paying an extra $0.80 to use clean water is worth it.
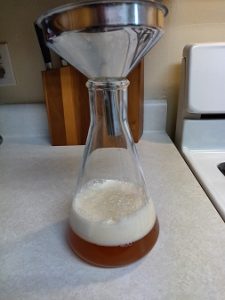
Step #4 – Pitch yeast
All that’s left for you to do now is pitch your yeast! Using your sanitized scissors, cut your yeast packet open and carefully pour it into your flask via the funnel.
And just like that, you’ve created a yeast starter in a matter of a few minutes! How easy is that?
Step #5 – Cover, shake, and move on
Take a piece of sanitized foil, give it a quick spray of Star San, and cover the top of your flask with it. Pick up the flask and carefully swirl things around to get the yeast mixed in nicely.
If you have a stir plate, place it on the stir plate and let it do its thing. Otherwise, just give it a good shake for 30 seconds or so each time you walk by it. Doing so will help up the oxygen intake and create a good environment to help your yeast grow.
That’s It!
Seriously, that’s all there is to it. It’s so stupidly easy and probably one of the most convenient methods of creating a yeast starter. Once you give it a shot, you’ll be kicking yourself for not trying it sooner!
What About Canning Your Own Wort?
Whenever there is talk about canned wort, I hear many start to bring up the idea of canning wort at home.
Don’t get me wrong, it’s a great idea, but it doesn’t come without an expense. You’ll need a decent size pressure canner to make it worth canning your own wort. If you have a pressure canner already, then you’re a few steps ahead of the game and it might be worth going for. If not, get ready to pull out your wallet.
One thing you also need to consider is that creating your own canned wort can still take up a big chunk of time. You also need to be careful with the process so that you sterilize the wort correctly. Otherwise, you’re taking a big risk if you’re not fully comfortable with the process.
Trust me, you don’t want botulism in your beer, nor does anyone else.
Maybe one of these days when I get more time, I’ll venture off and pursue canning my own wort. Until then, if I’m not doing a starter the traditional way, it’s Propper Starter all the way for me!
Other Propper Starter Tips
Here are a few extra tips that can help you get the most out of your Propper Starter experience:
- Propper Starter canned wort is shelf-stable for up to 12 months. I generally store it cold until I am ready to use it. On the day I plan to make my starter, I pull a can from the fridge in the morning and let it warm up to room temp throughout the day. It isn’t necessary, but it can help extend shelf-life if you plan to stock up on the stuff.
- As a reminder, make sure to sanitize the top of the can as well as the outside of it. A couple of quick sprays of Star San solution from a spray bottle is plenty enough to do the trick.
- If you’re making large starters (more than 1L in size), you’ll need one can for every liter. 2L starter – 2 cans, and so on. I admit that this is where things can get costly, so making a traditional starter might be worth the extra time involved.
Make Your Brew Day Easier
All in all, making a traditional starter is typically cheaper, but again, Propper Starter comes with convenience. You literally sanitize everything, pop the tab, pour the canned wort into your starter vessel, top it off with 16 ounces of water, pitch yeast, cover, give it a shake, and you’re done.
I still keep plenty of dry malt extract on hand and utilize it when I have time or need to create step-starters. When time is short and a quick starter is needed though, I’ll always reach for a can of this handy prepackaged wort.
If you’re on the fence, consider giving it a shot. I hope that you find it as easy and convenient as I have!
Get Yours Here: Propper Starter 4-Pack at MoreBeer